This plugin requires the use of a theme that is compatible with Full Site Editing (FSE) and Block-Based WooCommerce themes. If you are using a classic PHP-based or hybrid theme, the plugin may not function correctly.
Allows a visitor the option of having shipping billed to its account with a shipping provider.
Merchants can specify the shipping providers it will accept for the “bill shipping to” arrangement.
All shipping methods are supported (e.g. postal, parcel, freight) as long as the shipper can provide a bill-to shipping account number.
Works anywhere in the world, for any type of shipping provider that offers account number billing to its customers.
Current version: 1.0
Requirements
WooCommerce 5.7 or newer.
An API Key from Eniture Technology.
FAQs
What shipping providers will the plugin support?
The plugin allows the merchant to identify the shipping providers it is willing to accept bill-shipping-to information for. There are no restrictions on the providers the merchant can identify.
Will the app validate the shipping account number provided during checkout?
No. The plugin simply gives the visitor the option to identify a bill-to shipping provider listed as supported by the merchant, and enter an account number. The merchant is solely responsible for verifying the validity of the account number with the shipping provider before tendering the shipment, and for any charges the shipping provider may bill back if it is unsuccessful billing the account number provided.
Installation & User’s Guide
If you are taking advantage of a trial subscription, the plugin will stop working when the trial period ends. Be sure to read the Managing Your Eniture API Key section to learn how to upgrade your subscription.
Overview
Other information contained in this guide:
1. Register for the Eniture API Key |
Return to top. |
Click the Get a free 15 day trail button at the top of the page to register to use the plugin and gain access to the installation file. You don’t have to provide a credit card to gain access to the free trial. However, after the free trial period, the plugin will stop working until you upgrade to a paid subscription.
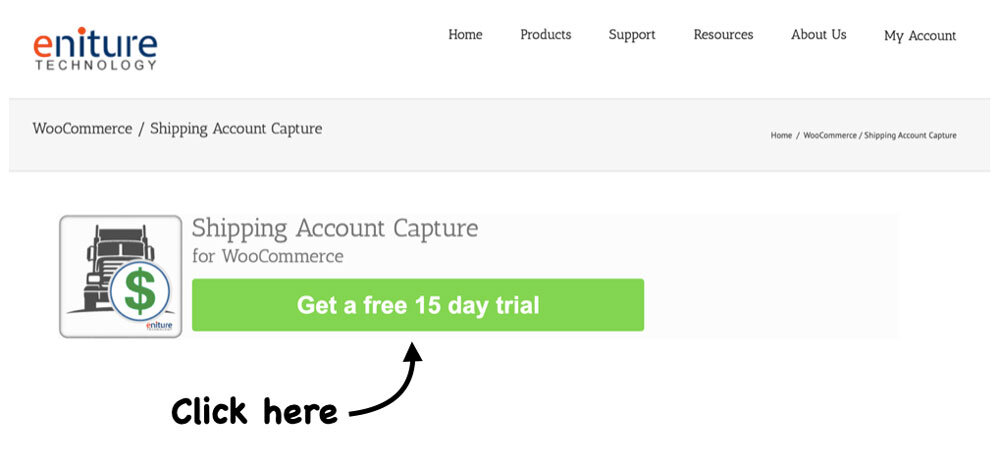
After you click the Get a free 15 day trail button, you’ll be presented with a registration form. The email address and password you enter will serve as your credentials to eniture.com. You’ll use these to gain access to the customer dashboard where you can download the plugin installation file, manage your Eniture API Key, and update your payment information.
If you didn’t provide a credit card on the registration form, you’ll receive a verification email. To complete the registration process you will need follow the instructions in the email. Afterward, you’ll gain access the customer dashboard. If you provide a credit card on the registration form, you’ll have immediate access to the customer dashboard.
After you register, you’ll receive an email containing your Eniture API Key. You can also retrieve your API key by signing in to eniture.com and clicking on My API Keys in the navigation menu.
2. Using the Eniture API Key |
Return to top. |
The Eniture API Key will work for one production site and one staging site. You entered the domain for the production site when you completed the registration form. You can change the production site domain or add/update a staging site anytime from the customer dashboard. To update the registered production or staging site, login to eniture.com and click on the My API Keys tab. Enter or update the fields for the Production or Staging site URL as needed.
3. Retrieve the Installation File |
Return to top. |
If you installed the plugin from the plugin directory on wordpress.org, skip to Step 5: Activate the Plugin.
While logged into eniture.com, click on the Downloads link in the navigation menu. Locate the plugin and then click the link to download the installation file. Save the file to a familiar location because you’ll need to navigate to it during the installation process.
4. Upload the Plugin Installation File |
Return to top. |
Login to the WordPress dashboard as the website administrator.
Using the WordPress navigation menu, hover your mouse over the Plugins to display the sub-menu options.
Select Add New from the sub-menu options. The Add Plugins page will load.
At the top of the Add Plugins page, click on the Upload Plugin button.

Controls will appear in the middle of page that will allow you to choose and install the plugin application. Click the Choose File button, navigate to the location where you saved the installation file and select it.

Click the Install Now button.
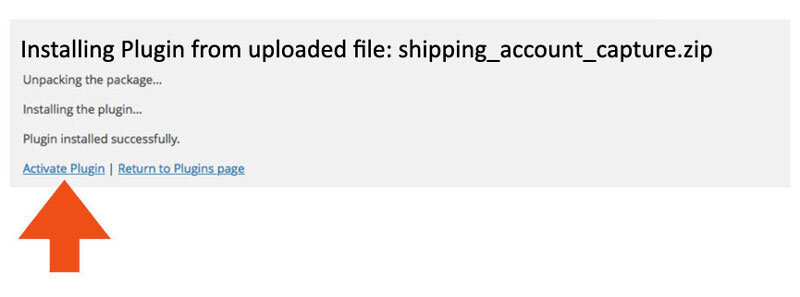
WordPress will display information about the installation progress at the bottom of the page. The plugin has been installed once the message Plugin installed successfully is displayed.
5. Activate the Plugin |
Return to top. |
Once the plugin has been installed, it must be activated. If you are still on the same page that you were on at the end of the previous step, you can click the Activate Plugin link on the bottom of the page.
If you already navigated away from that page, use the WordPress navigation menu to select Installed Plugins from the Plugins menu.

Locate the Shipping Account Capture plugin on the list and click the Activate link.
6. Connect the Eniture API Key |
Return to top. |
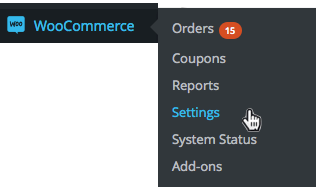
Select Settings from the WooCommerce menu.
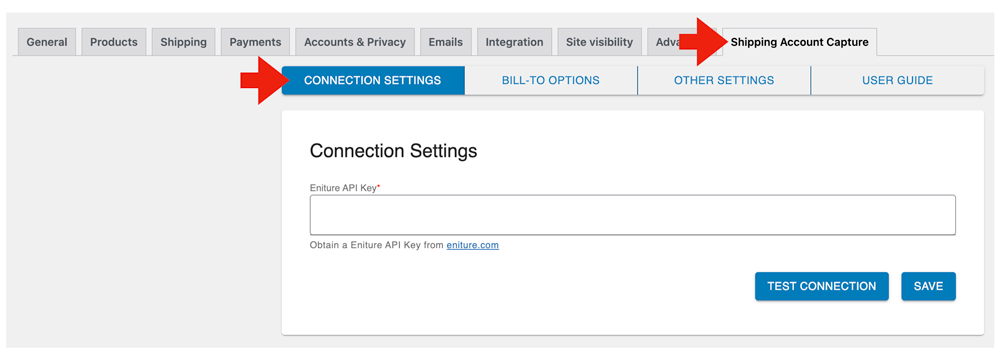
Click on the Shipping Account Capture tab to gain access to the plugin configuration settings. Select the option for Connection Settings.
Enter the Eniture API Key for the plugin, click the SAVE button, and then the TEST CONNECTION button. If the API key is valid and in good standing, you will get an alert informing you of a successful test.
7. Add the Bill-to options |
Return to top. |
To add a shipping provider, while on the Shipping Account Capture tab, click on the option for Settings, and then + Add a bill-to option.

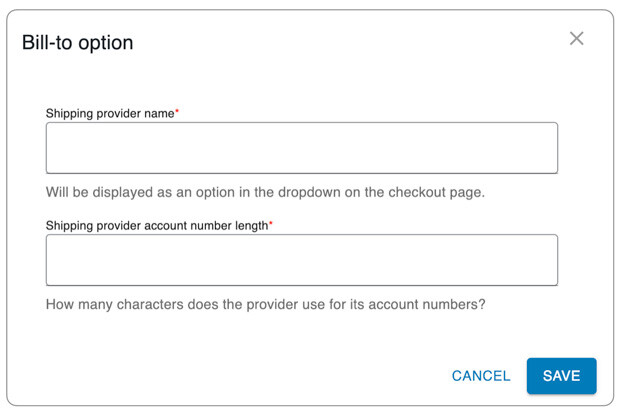
Type in a name for the shipping provider, such as “UPS”. What you enter will be seen in the dropdown list on the checkout page of the shipping providers you will accept bill-to information for. In the next field, enter the number of characters you expect the provider’s account number to be. This is not used for validation purposes. Instead, it is used to display the number of characters available for the service description, and counts the number of characters you’ve entered for it. This is a convenience so you know how long your service description is before it will be truncated when displayed to the visitor.
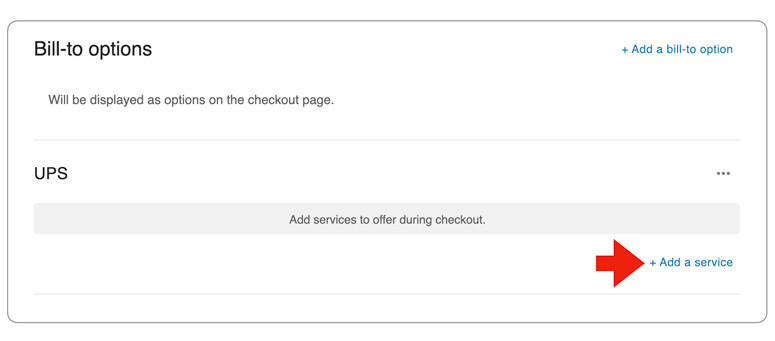
Next, click the + Add a service link to add a service for the shipping provider. (The illustration shows UPS as the added shipping provider.)
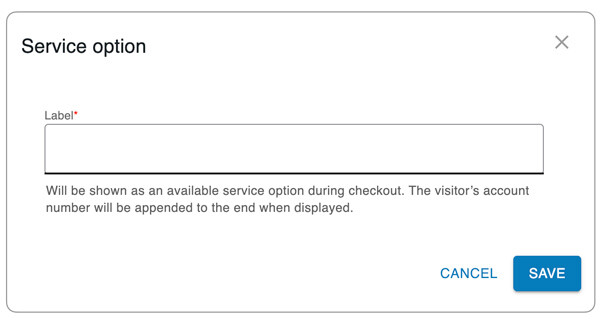
Enter the name of the provider’s service the way you want visitors to see it. For example, if UPS is the shipping provider and you enter Ground in this field, then visitors will see Ground as the service option. If you want visitors to see UPS Ground instead, then enter UPS Ground in this field. The visitor’s account number will be appended to what you enter and will appear as [service as entered]: Bill to account [account number] on the checkout page.
Repeat the + Add a service operation for each of the shipping provider’s services you want your visitor to have access to.
Repeat this step for each shipping provider you want you want to offer as a bill-to your shipping account option.
8. Other settings |
Return to top. |
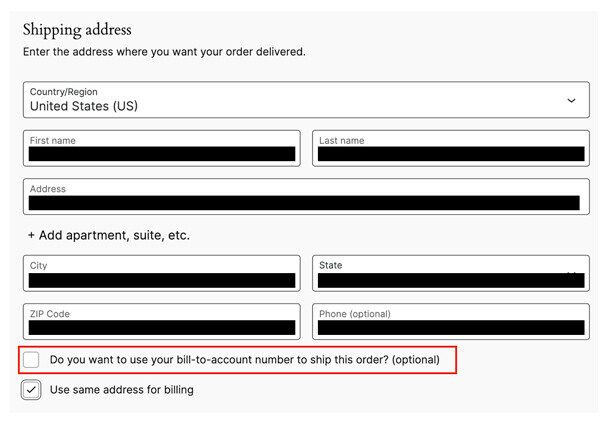
You can change the text used for the prompt on the Other Settings page.
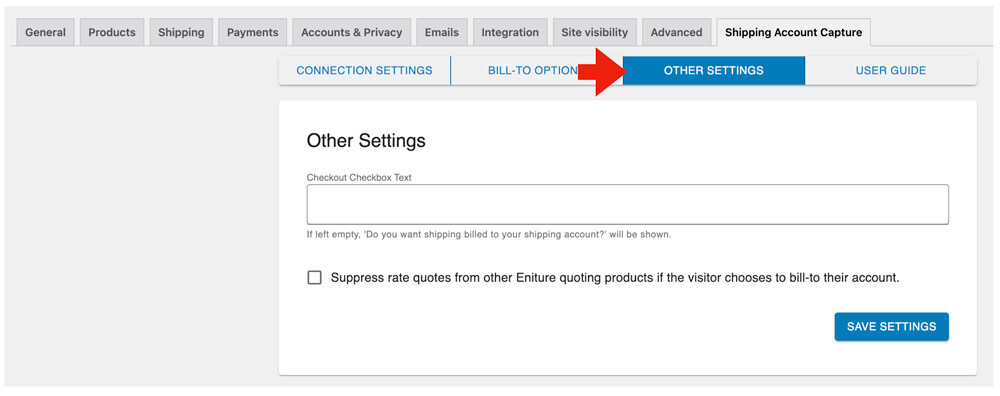
Enter the text you want to be used for the prompt.
Beneath the field is a checkbox labeled, Suppress rate quotes from other Eniture quoting products if the visitor chooses to bill-to their own account. This checkbox is only relevant if you are using other shipping quote plugins from Eniture Technology. Enabling the checkbox will cause shipping quotes from these plugins to be suppressed if the visitor chooses the option to have shipping billed to its account. In this case, the visitor may only see the bill-to account options if there aren’t any non-Eniture Technology shipping methods active in the shipping zone. If left disabled, the visitor will see the the bill-to account options and the shipping rates enabled in the other Eniture Technology shipping quotes plugins.
9. Add the plugin to shipping zones |
Return to top. |
After you have your bill-to account shipping options defined (or at least one of them), you must add the plugin to the shipping zone(s) in which you want it offered.Select Settings from the WooCommerce menu.

Click on the Shipping tab and select the option for Shipping Zones.

If an appropriate shipping zone isn’t already defined, click the Add zone button to add it. If the correct one already exists, click on the Edit link.
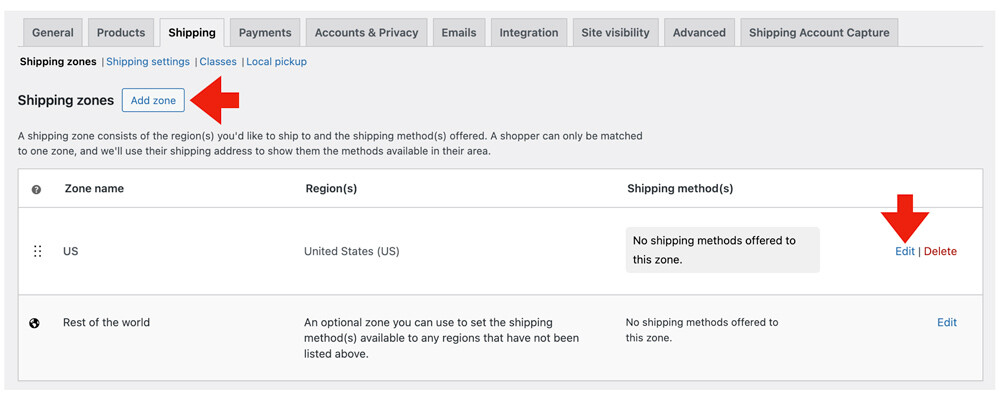
Add the Shipping Account Capture plugin to the shipping zone by clicking on the Add shipping method button.

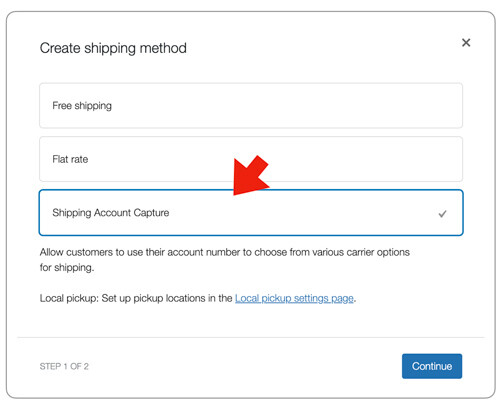
Select the Shipping Account Capture plugin from the list of options, and click Continue.
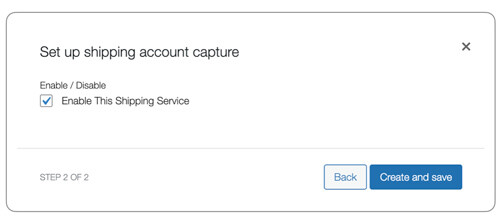
Enable the Enable This Shipping Service checkbox, and click the Create and save button.
Afterward, the Shipping Account Capture plugin should appear in the shipping zone as an enabled method.

Repeat these steps for other shipping zones in which you want the plugin to offer bill-to options during checkout.
Your customer’s experience |
Return to top. |
On the Checkout page, the customer will have the option of enabling the checkbox that will give the option of having shipping billed to its account.

If enabled, the customer will be prompted to select the shipping provider (the list of options in the dropdown will be limited to what you set up in the plugin), enter its account number with that provider, and provide associated billing postal code (if required by your settings) for the account.

In the Shipping options section, the bill-to options you defined will appear along side the other shipping methods that are enabled.

What you see |
Return to top. |
If a customer chooses a service option for a shipping provider you’ve created as a bill-to option, the information will appear in the details when viewing the order from the Admin area.
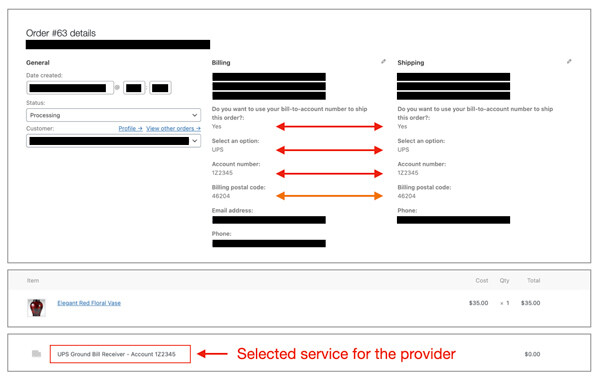
The main body of the order details will inform you that the customer chose to have shipping billed to its shipping account number, who the shipping provider is, the shipping account number, and the billing postal code if it was provided. Beneath the Cart contents, the service option selected during checkout will be displayed.
Managing Your Eniture API Key |
Return to top. |
You can manage your Eniture API Key by signing into eniture.com with the email address and password you entered when you registered for the plugin. After you sign in, My Account will be added to the navigation menu. Click on it to access the Dashboard for your account.

Use the links below to navigate to documents in the knowledge base related to common topics of interest.


