 |
LTL Freight QuotesCerasis Edition for Prestashop |
Cerasis (cerasis.com) is a third party logistics company that gives its customers access to dozens of LTL freight carriers through a single account relationship. This application retrieves your negotiated Cerasis rates, takes action on them according to the extension settings, and displays the result as shipping charges in the checkout process. To establish a Cerasis account click here to access the new account request form.
Features
Displays negotiated LTL shipping rates in the shopping cart.
Provides quotes for shipments within the United States and to Canada.
Define a custom label to identify the LTL freight rate in the cart.
Elect to display carrier transit times with rate estimates.
Choose to display a list of carriers, the cheapest option, or an average rate.
Define multiple warehouses.
Identify products that drop ship from vendors.
Product specific shipment parameters: weight, dimensions, freight class.
Option to set a product’s freight class automatically through the built in density calculator.
Support for variable products. Shipment parameters can be set differently for each product variation.
Options for how to include the residential delivery charge.
Options for how to offer lift gate delivery charge.
Option to mark up shipping rates by a set dollar amount or by a percentage.
Works seamlessly with other quoting modules published by Eniture Technology.
Current version: 1.0
Requirements
Your Cerasis Shipper ID.
Your username and password to the Cerasis online shipping system.
Your Cerasis API Access key.
FAQ’S
How do I get a Cerasis account number?
Call Cerasis at 1-800-734-5351 or click here to complete a form that will immediately provide you with credentials to use with the extension and also initiate the new account process.
Where do I find my Cerasis username and password?
Cerasis issues usernames and passwords to its online shipping system Cerasis Rater. Contact Cerasis at 1-800-734-5351 to request credentials if you don’t already have them.
Where do I get my Cerasis authentication key?
If you are an existing Cerasis customer, call Cerasis at 1-800-734-5351. If you need to obtain a Cerasis account number click here to complete a form that will immediately provide you with credentials (including the authentication key) to use with the extension. Completing the form will also initiate the new account process.
How do I get a license key for the module?
You must register your installation of the module, regardless of whether you are taking advantage of the trial period or purchased a license outright. At the conclusion of the registration process an email will be sent to you that will include the license key. You can also login to eniture.com using the username and password you created during the registration process and retrieve the license key from the My Licenses tab.
How do I change my module license from the trial version to one of the paid subscriptions?
Login to eniture.com and navigate to the My Licenses tab. There you will be able to manage the licensing of all of your Eniture Technology products. Refer to the Documentation tab on this page for more thorough instructions.
How do I install the module on another website?
The module has a single site license. To use it on another website you will need to purchase an additional license. If you want to change the website with which the module is registered, login to eniture.com and navigate to the My Licenses tab. There you will be able to change the domain name that is associated with the license key.
Do I have to purchase a second license for my staging or development site?
No. Each license allows you to identify one domain for your production environment and one domain for your staging or development environment. The rate estimates returned in the staging environment will have the word “Sandbox” appended to them.
Why isn’t the module working on my other website?
If you can successfully test your credentials from the Connection Settings page then you have one or more of the following licensing issues: 1) You are using the license key on more than one domain. The licenses are for single sites. You will need to purchase an additional license. 2) Your trial period has expired. 3) Your current license has expired and we have been unable to process your form of payment to renew it. Login to eniture.com and go to the My Licenses tab to resolve any of these issues.
Why are the shipment charges I received on the invoice from Cerasis different than what was quoted by the app?
Common reasons include a difference in the quoted versus billed shipment parameters (weight, dimensions, freight class), or additional services (such as residential delivery) were required. Compare the details of the invoice to the shipping settings on the products included in the shipment. Consider making changes as needed. Remember that the weight of the packing materials is included in the billable weight for the shipment. If you are unable to reconcile the differences call Cerasis customer service for assistance.
Why do I sometimes get a message that a shipping rate estimate couldn’t be provided?
There are several possibilities:
The most common reason is that one or more of the products in the shopping cart did not have its shipment parameters (weight, dimensions, freight class) adequately populated. Check the settings for the products on the order and make corrections as necessary.
The city entered for the shipping address may not be valid for the postal code entered. A valid City+State+Postal Code combination is required to retrieve a rate estimate. Contact us by phone (404-369-0680) or email (support@eniture.com) to inquire about Address Validation solutions for this problem.
Your shipment exceeded constraining parameters of Cerasis’s web service.
The Cerasis web service isn’t operational.
Your Cerasis account has been suspended or cancelled.
There is an issue with the Eniture Technology servers.
Your subscription to the application has expired because payment could not be processed.
There is an issue with your server.
How do I determine the freight class for my product(s)?
The easiest thing to do is to contact your Cerasis representative and ask for assistance. However, the official source is the National Motor Freight Classification (NMFC) directory maintained by the National Motor Freight Transportation Agency (NMFTA.org). You can purchase a hard copy of the directory or obtain an online subscription to it from their web site.
How does the density calculator work?
The density calculator will calculate a freight class by performing a calculation using the product weight and dimensions as inputs. In most cases the returned freight class will match the product’s (commodity’s) freight class as recorded in the National Motor Freight Classification (NMFC) directory. However, this is not always true and in the event there are differences, the freight class recorded in the National Motor Freight Classification (NMFC) directory takes precedence. An incorrectly identified freight class can result in unexpected shipping charges and even fees. You are solely responsible for accurately identifying the correct freight class for your products. If you need help doing this, contact your Cerasis representative for assistance.
Installation & User’s Guide
If you are taking advantage of a trial subscription, the module will stop working when the trial period ends. Be sure to read the Manage Your License section to learn how to upgrade your subscription.
Overview
Setting up the plugin consists of the following steps:
Other information contained in this guide:
1. Download the Installation File |
Return to top. |
Choose a subscription package by clicking on it. You will be presented with a registration form. The email address and password you enter will serve as your credentials to eniture.com. Use these to gain access to your customer dashboard where you can download the module installation file, manage your licenses and update your payment information.
Select the Downloads tab and click on the Download code link to retrieve the module installation file.

Save the file to a familiar location. You will need to navigate to it to install the module.
2. Install the Module |
Return to top. |
Login to Prestashop.
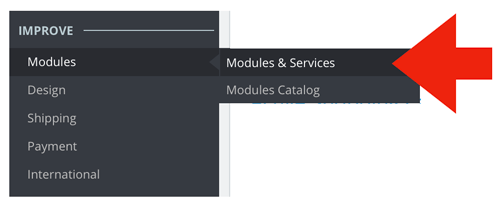
Choose Modules and then Modules & Services from the navigation menu.
Click on the Installed Modules tab and then the UPLOAD A MODULE button.

Drag the module installation file into the upload box or choose the select file link to navigate to the file and retrieve it.

The module will self install.
3. Get your Cerasis Rater API Key |
Return to top. |
To successfully connect the app to Cerasis you need your Cerasis Shipper ID, your username and password to Cerasis Rater, and an API Access Key .
If you are an existing Cerasis customer, obtain your API Access Key by calling Cerasis at 1-800-734-5351.
If you aren’t an existing Cerasis customer, call Cerasis at 1-800-734-5351 or click here to complete a form that will immediately provide you with credentials to use with the app and also initiate the new account process.
4. Configure the Module |
Return to top. |
Select Modules and then Modules & Services from the PrestaShop menu.

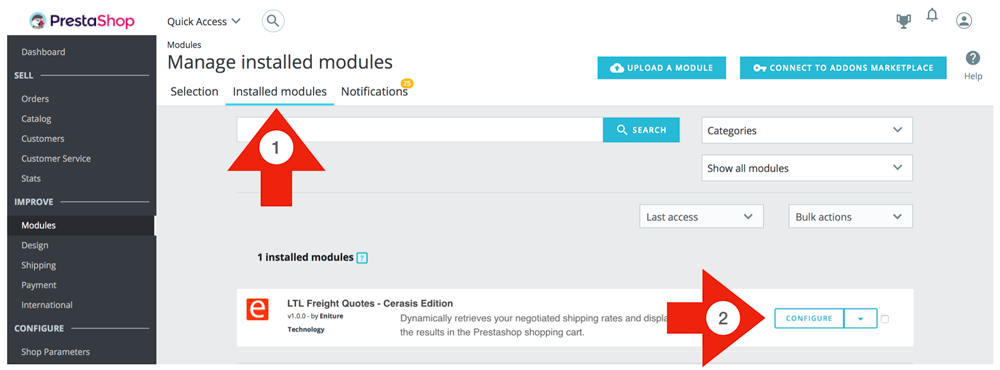
Click on Installed Modules and then locate the module in the list of installed modules. Click on the Configure button.
4a. Connection Settings |
Return to top. |
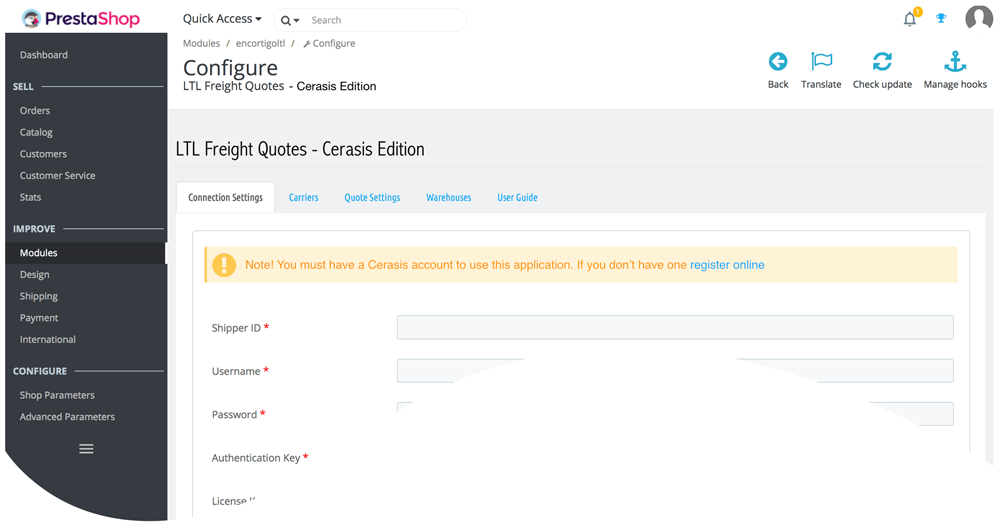
| Shipper ID | Enter your Cerasis account number. |
| Username | Enter your username to Cerasis Rater. |
| Password | Enter your Cerasis Rater password. |
| ID | Enter the Cerasis Rater API access key. |
| License Key | The module license key is issued by Eniture Technology to registered users only. If you don’t have a module license key, click the link to the right of this field to obtain one. |
When you’re done save your connection settings and then test them by clicking on the Test Connection button at the bottom of the page. A message will display at the top of the page letting you know if the plugin succeeded in establishing a connection to the Cerasis servers. If you receive an error, confirm the values you entered and try again. Be particularly attentive to capitalization. Most of the information you enter on this page is case sensitive.
4b. Carrier Selection |
Return to top. |
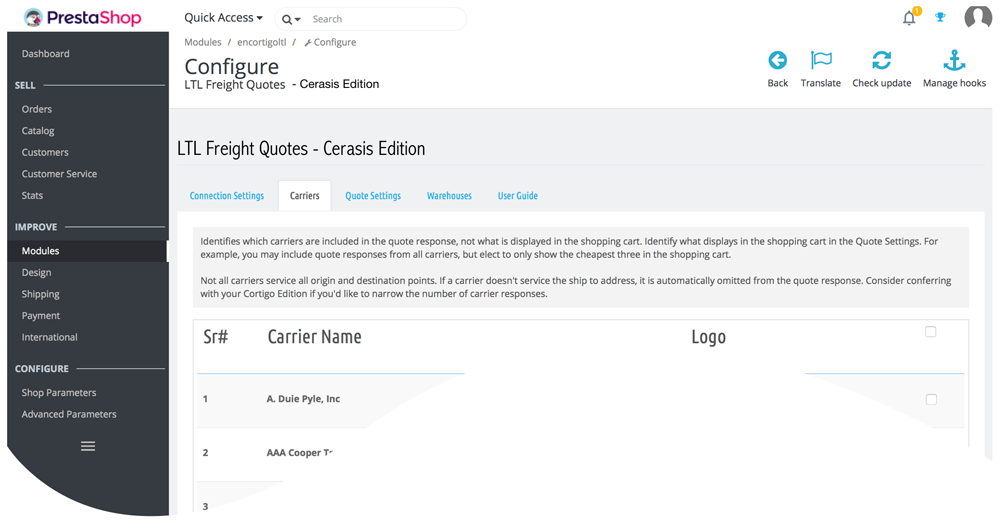
This page identifies which carriers will be included in the list of quotes retrieved from Cerasis. You can exclude a carrier by removing its checkmark from the Include column. To help the maintain the performance of the app, limit the number of carriers selected to 5 or less.
Not all carriers service all orgin and destination points. If a carrier doesn’t service either one of the addresses, it is automatically omitted. Consider conferring with your Cerasis representative if you want to reduce the number of carrier responses.
4c. Quote Settings |
Return to top. |
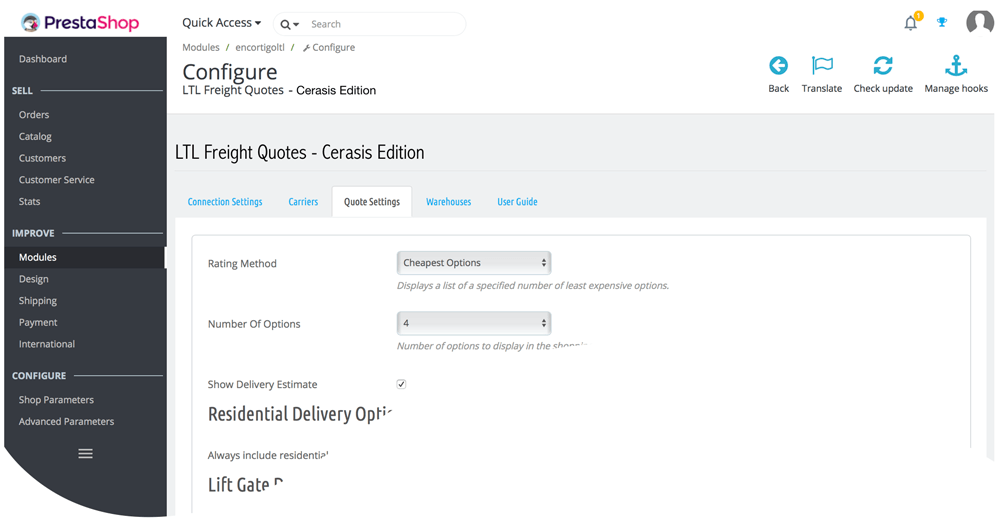
| Rating Method | The rating method determines what will be displayed in the shopping cart. There are three rating methods:
Cheapest Cheapest Options Average |
| Number Of Options | Displays only when the Rating Method is set to Cheapest Options or Average. Identifies how many of the quotes returned by Cerasis should be included in the operation. |
| Show Delivery Estimate | When checked, the carrier’s estimated transit time will be displayed. |
| Always include residential delivery fee | When checked, the quote returned will always include the carrier’s residential delivery fee. |
| Automatically detect residential addresses | This is visible only when the Auto-detect residential addresses module is installed. This is an optional pay per use feature. When enabled, the module will lookup the Ship To address in a database updated monthly with data from the USPS. If the address is a residence, the rate shown in the checkout process will include the carrier’s residential delivery fee. Enabling this feature makes the inclusion of the residential delivery fee dynamic. It will be excluded from rates for commercial addresses and included in rates for residential addresses. Residential delivery fees vary by carrier and are typically between $60 and $130. |
| Auto-renew | This is visible only when the Auto-detect residential addresses module is installed. Enable the Automatically Detect Residential Addresses feature by selecting a plan. Plans are billed to the same credit card used to pay for the subscription to the FedEx LTL Freight Quotes module. To ensure continuous operation, the next subscription will begin when the current one expires or is depleted, which ever comes first. To disable the feature, select the Disable option in the dropdown. |
| Current Subscription | This is visible only when the Auto-detect residential addresses module is installed. Provides information on the current subscription, when it began and when it expires if it isn’t depleted first. |
| Current Usage | This is visible only when the Auto-detect residential addresses module is installed. Provides information on how much of the current subscription has been used. A UTC timestamp is provided to identify the last time a lookup was performed. |
| Suspend automatic detection of residential addresses | This is visible only when the Auto-detect residential addresses module is installed. Suspends the execution of the automatic detection of residential addresses programming. This does not cancel the subscription to the feature or prevent renewals. This setting is typically used during testing and trouble shooting when it is desirable not have the feature operational. |
| Always include lift gate delivery fee | When checked, the quote returned will always include the carrier’s residential delivery fee. |
| Offer lift gate delivery as an option | When checked, an additional option will be presented to the shopper that will include the lift gate delivery fee. The shopper will be able to choose between options that exclude or include lift gate delivery. |
| Always include lift gate delivery when a residential address is detected | This is visible only when the Auto-detect residential addresses module is installed. When checked, if a residential delivery address is detected the lift gate delivery fee will be included in the shipping rate estimate. In such cases, the option to Offer lift gate delivery as an option will be suppressed, even if enabled. Enabling both the Offer lift gate delivery as an option setting and the Include lift gate delivery when residential delivery is detected setting allows commercial customers to choose whether or not lift gate service is needed while always requiring it for residential customers. |
| Handling Fee / Mark Up | Increases the amount of the returned quote by a specified amount prior to displaying it in the shopping cart. The number entered will be interpreted as dollars and cents unless it is followed by a % sign. For example, entering 5.00 will cause $5.00 to be added to the quotes. Entering 5.00% will cause each quote to be multiplied by 1.05 (= 1 + 5%). |
| Return freight quotes when an order’s parcel shipment weight exceeds 150 LBS | When checked, the LTL Freight Quote module will return quotes when an order’s total weight exceeds 150 lbs (the maximum permitted by FedEx and UPS), even if none of the products have settings to indicate that it will ship LTL. To increase the accuracy of the returned quote(s), all products should have accurate weights and freight classes. |
4d. Warehouse Settings |
Return to top. |
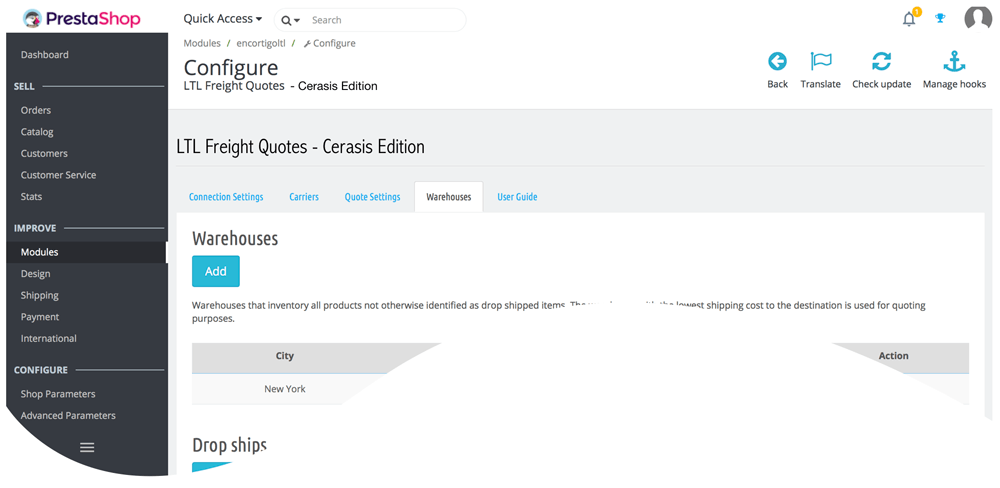
Click the Add button in the appropriate sections to add warehouse and drop ship locations. Warehouses should have a complete inventory of all products not otherwise identified as drop shipped items. If you have more than one warehouse defined, the warehouse closest to the shopper will be used to retrieve shipping rate estimates. You should define at least one warehouse, even if all of your products are drop shipped. This insures that quotes will be returned in the event the drop ship location was overlooked when the product entry was created.Drop ship locations usually represent vendors that supply items that you don’t inventory. These items are shipped directly to your customer on your behalf. When an order includes drop shipped items the shopping cart will display a single figure for the shipping rate estimate that is equal to the sum of the cheapest option for each shipment required to fulfill the order.
5. Carrier Settings |
Return to top. |
Prestashop creates a “carrier” entry for every possible shipping method variant. If you consider “LTL freight” as the base variant, four entries are created:
- Base variant
- Base variant + residential delivery
- Base variant + lift gate delivery
- Base variant + residential and lift gate delivery
These entries are created automatically when the module is installed and don’t require any further action on your part. However, if you’d like to see or edit these entries, use the Prestashop menu to navigate to Shipping > Carriers…
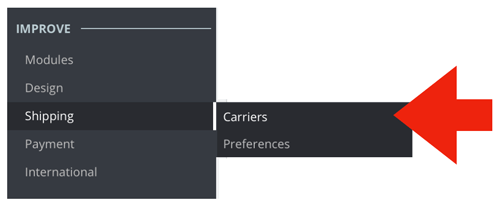
The shipping method variants will be listed. You can click on any entry to edit it but we strongly advise against editing the entries associated with the LTL Freight Quotes module. Doing so may have an adverse impact on the module’s performance.

6. Product Settings |
Return to top. |
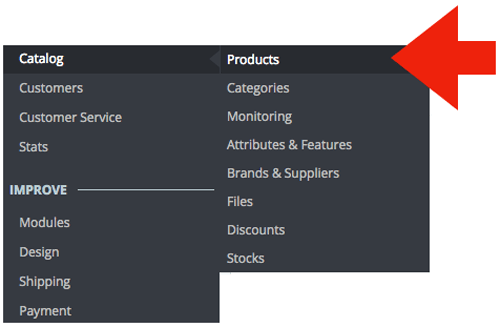
Navigate to your product list by selecting Products from the Catalog menu.
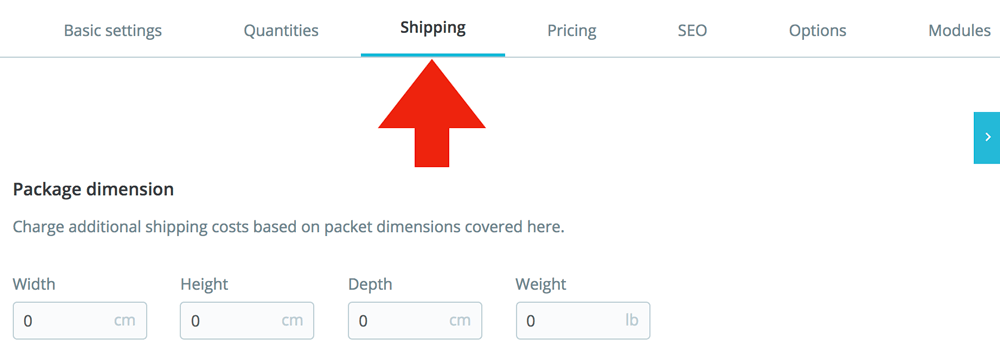
Select the product you want to ship LTL freight from the list. Once you’re on the Edit Product page, click on the Shipping option in the page navigation menu and enter the product weight.
Next, click on the Modules option in the page navigation menu.

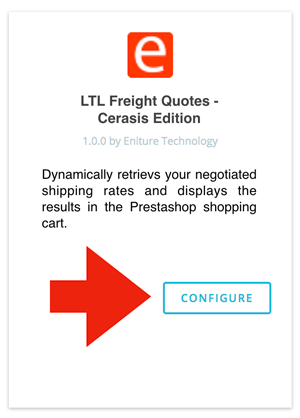
Locate the module placeholder card and click on the Configure button.
On this page you’ll identify parameters that are specific to the module. Make the appropriate selections.
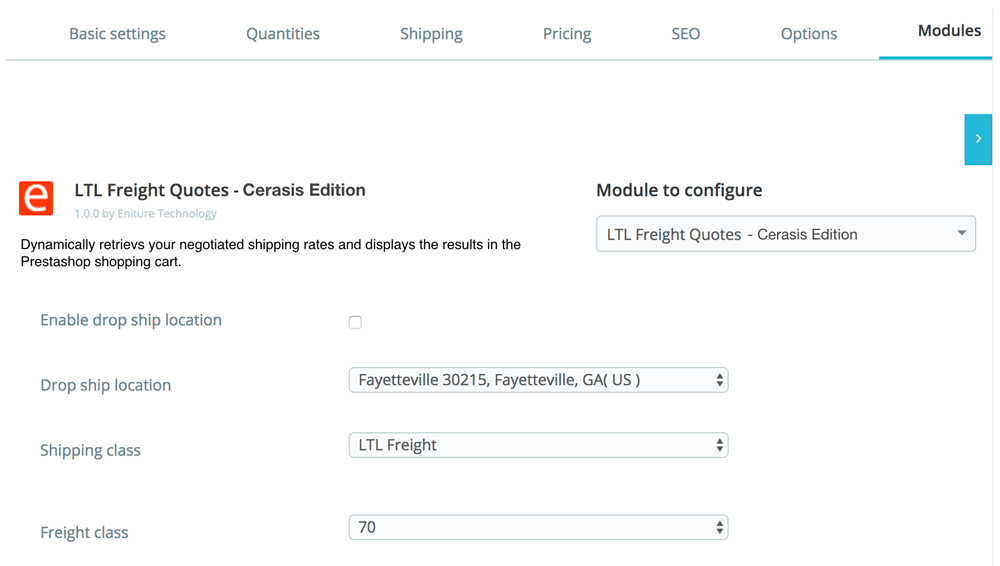
| Enable drop ship location | Check this box only if the item will be drop shipped. If left unchecked, the warehouse closest to the Ship To address will be used as the origination point for the freight quote. |
| Drop ship location | If you indicated that the item will ship from a drop ship location, identify the location from which the item will ship. |
| Shipping Class | If you have one of the Small Package Quotes modules installed and you want the product to be quoted as shipping parcel, select the No shipping class option.
If you want the product to be quoted as shipping LTL freight, select the LTL Freight option. |
| Freight class | Select the freight class for the item from the list of options. If you utilize both small package (parcel) and LTL freight shipping methods, you should identify the freight class for all products, even those that normally ship small package (parcel).
The last option in the list of freight classifications is Density Based. In most cases this is an industry accepted alternative for identifying the freight class of an item or shipment. Validate the returned quotes if using this setting. There are exceptions in the NMFC Freight Classification Directory that can render the density calculator results invalid for particular commodities. To be used successfully the product must have its weight and dimensions populated on the Shipping page. |
When you are done click the Save button located at the bottom of the page.
What Your Customer Sees |
Return to top. |
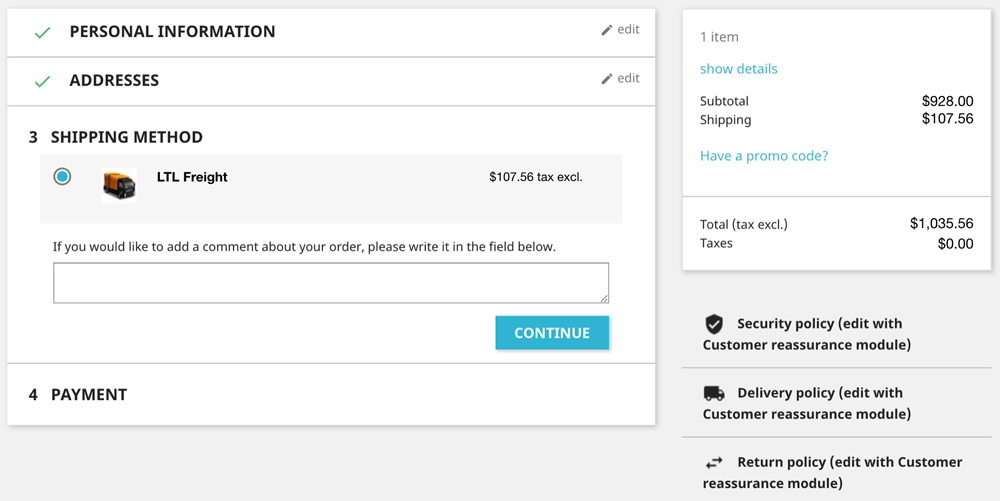
To facilitate the successful conclusion of an online purchase the module always attempts to return an estimate of shipping charges. If multiple products are in the shopping cart and some are missing weight, dimensions or both, the module will use what is available to obtain the shipping rate estimates. For example, if you have two products in the shopping cart and the first has weight and dimensions and the second does not, the shipping rate estimate will be based solely on the first product. The module will fail to return shipping rate estimates only when none of the products in the shopping cart have weights or dimensions recorded. Please note that shipping rate estimates will be increasingly inaccurate the more omissions there are to the weight, freight class, and dimensions of products in the shopping cart.
Managing Your License |
Return to top. |
You can manage your license by signing into eniture.com with the email address and password you entered when you registered for the module. After you sign in, My Account will be added to the navigation menu. Click on it to access the Dashboard for your account.

The most common uses of the Dashboard are to upgrade a trial subscription to a paid subscription, change the URL registered to a license, or to identify the URL of a staging or development site.
Upgrade to a paid subscription
If you fail to upgrade your trial subscription to a paid subscription before the trial expires, the module will stop working. To upgrade, click on the My Licenses tab, locate the license, and click the Pay Now button.

Choose one of the subscription packages and then enter the information for your payment method. Your module will be automatically renewed at the end of each subscription period unless you return to the Dashboard and cancel the subscription.
Change the URL registered to a license
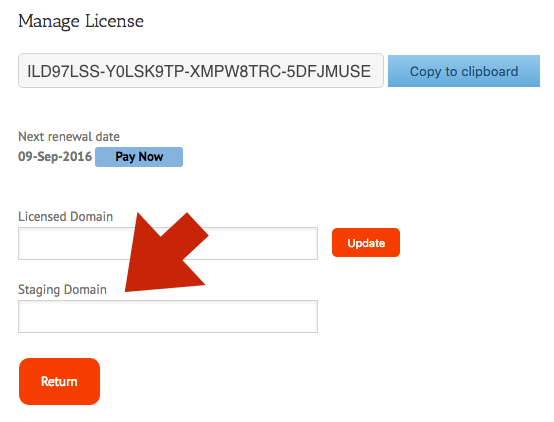
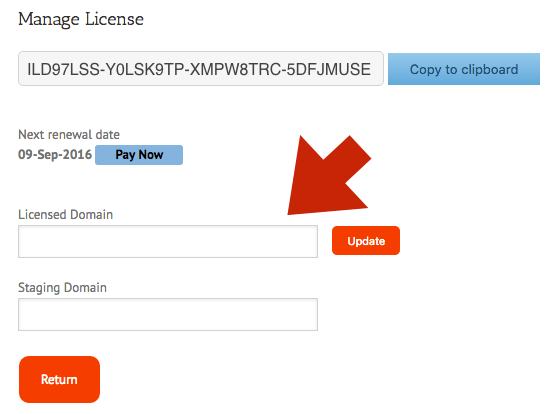
The license allows you to use the module on a single website. To use the module on additional websites, you must purchase additional licenses. You can change the URL registered on a license at any time. To do so, click on the My Licenses tab, locate the license, and click the Edit button. Enter the new URL into the Licensed Domain field and then click the Update button.
Identify a staging or development site
The license will allow one staging or development site. Quotes returned to staging site will have the word “Sandbox” appended to them. To identify a staging site, click on the My Licenses tab, locate the license, and click the Edit button. Enter the new URL into the Staging Domain field and then click the Update button.
