$6.75 / month
14 day free trial
Improve your conversion rate and the shopping experience of tax exempt shoppers by allowing them to declare their tax exempt status during the checkout process. Without this app tax exempt shoppers must contact you about their tax exempt status, limiting the ability to do business with them to your regular business hours. Allowing shoppers to declare their tax exempt status during the checkout process returns your store to a 24/7 operation, increases the likelihood of order capture, and eliminates headaches for everyone.
This app has been submitted to the Shopify App Store and is currently under review. The Tax Exempt Checkout app won’t be available in the Shopify App Store until the review process has been completed. In the interim, you can install the app by clicking the GET button on this web page.
Features
Turns your store into a 24/7 store front for tax exempt shoppers.
Increases sales by providing a better user experience to tax exempt customers.
Reduces your work load by enabling tax exempt declaration during checkout.
Easily replace the text on the widget to reflect your word and language preferences.
Receive email notifications of new customer orders with tax exempt declaration.
Current version: 1.0
Requirements
None.
FAQ’S
How do I get this app?
This app is not currently available in the Shopify App Store and can only be installed from this web page. Click the GET button at the beginning of this listing to start the installation process.
Why isn’t the app in the Shopify App Store?
The app has been submitted to the Shopify App Store and is currently under review.
How is the app billed?
Shopify will bill you for the app just like any app you have installed from the Shopify App Store.
Is the app supported the same way as other apps you have available in the Shopify App Store?
Yes. We provide support for all of our apps, regardless of their availability in the Shopify App Store. Support inquiries can be made by emailing support@eniture.com or by calling 404-369-0680, extension 2.
Will the app confirm a shopper’s tax exempt status?
No. It simply makes it more convenient for the shopper to indicate that they are tax exempt. You still need to perform the verification steps set forth by your state.
How will the app impact my existing tax exempt customers?
There is no impact. The app checks your store’s customer records when sufficient information is known about the shopper. If an entry for the shopper is found, the app honors the tax exempt setting in the record.
User’s Guide
This app can only be installed by clicking the GET button on this web page. The app isn’t available in the Shopify App Store at this time. It has been submitted to the Shopify App Store for review and once it has been approved it will be available there.
Setting up the application consists of the following steps:
Other information contained in this guide:
1. Install the application |
Return to top. |
This app isn’t available in the Shopify App Store so you will need to install it from this web page. Click the GET button at the top of this page.
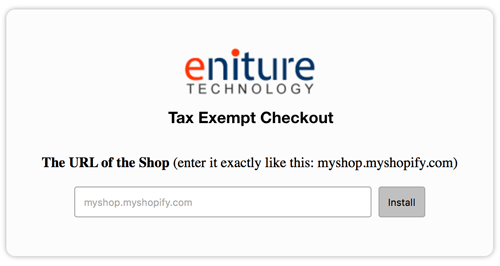
Enter your Shopify URL to identify what store the app will be installed on and click the Install button. The URL you enter should resemble your-store.myshopify.com.
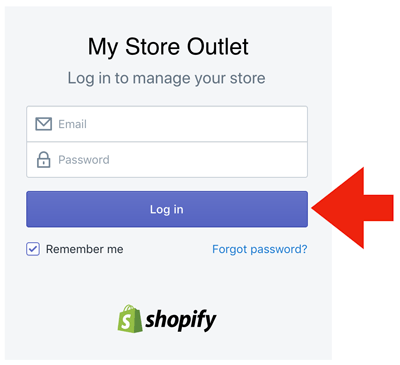
If you aren’t currently logged into your store you will be prompted to enter your Shopify username and password. Click the Login button afterwards. You must login with the Store Owner credentials to install the app. If you are already logged in, you may be automatically directed to the next step in the installation process.
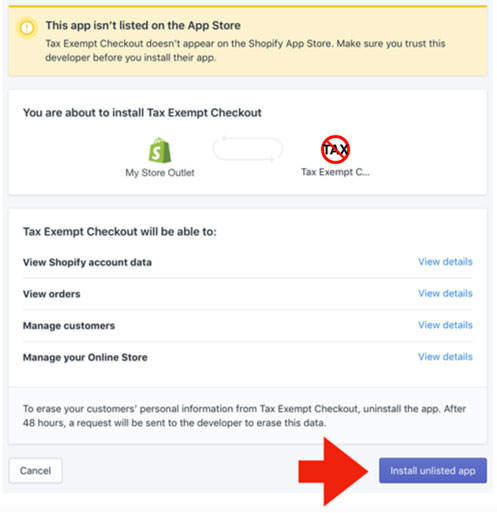
You’ll be presented with a page to notify you of the permissions the app needs to perform its function. It is prefaced by a warning that the app doesn’t appear in the app store. Don’t be concerned about this. We publish nearly two dozen apps in the Shopify App Store, and some other Shopify apps that aren’t. This particular app adds a tax exempt checkbox to one of the Shopify checkout pages and Shopify App Store doesn’t advertise apps that do so. Shopify will still bill you for the app’s monthly subscription fee. Click on the Install unlisted app button to continue to the next step.
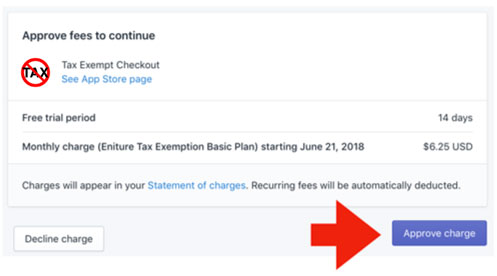
Review the fees for the app and then click the Approve charge button to complete the installation process.
2. Prepare Shopify to use the application |
Return to top. |
To display the Tax Exempt Status widget on the Cart page, your theme has to be modified. Several of Shopify’s free themes are automatically modified during the installation process. If the theme you’re using wasn’t, you’ll need to modify it yourself or ask for our assistance.
To see if your theme was modified during the installation process, add an item into the cart and then view the Cart page. If you see the Tax Exempt Status widget, then you’re all set and you can skip to Step 3: Choose the app settings.
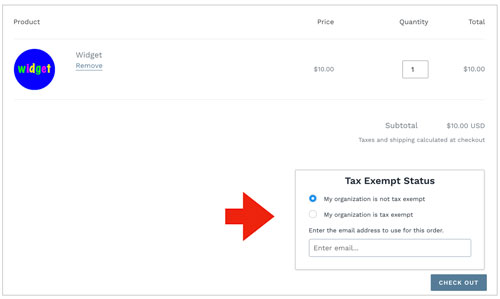
If you don’t see the Tax Exempt Status widget, then your theme still needs to be modified. You can modify the store’s theme yourself (instructions to follow) or have us do it for you.
To request our assistance, email support@eniture.com or open a support ticket by completing the Open Ticket form.
Include your Shopify URL (e.g. your-store.myshopify.com) in your request. In return, we’ll send a Collaborator’s Account Request (learn more). Once the request is approved we’ll have access to your store and will modify the template for you. To approve the request, you must be able to login to the store with the Store Owner’s credentials or have access to the inbox of the primary email address associated with the store.
Once the Collaborator’s Account is approved, please allow two business days for us to provide assistance. If you’re comfortable working with your theme, or adventurous enough to try it yourself, the remainder of Step 2 should take less than 10 minutes.
2a. Determine if your theme has sections. |
Return to top. |
Step 1
In the Shopify Admin menu, navigate to Online Store > Themes
Step 2
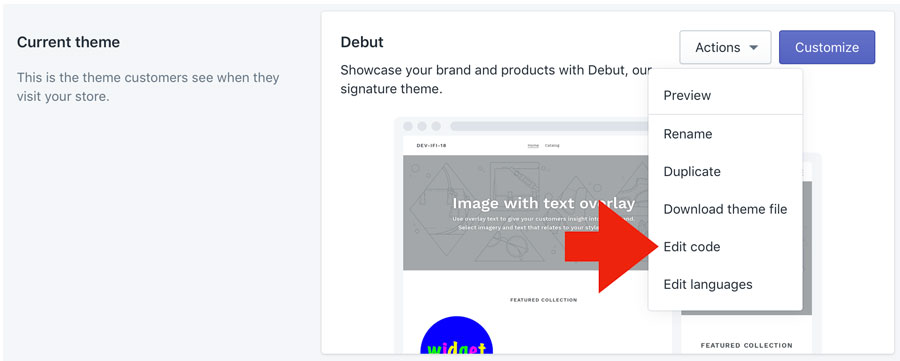
Click on the Actions button for the current theme and then click the option Edit code from the menu
Step 3
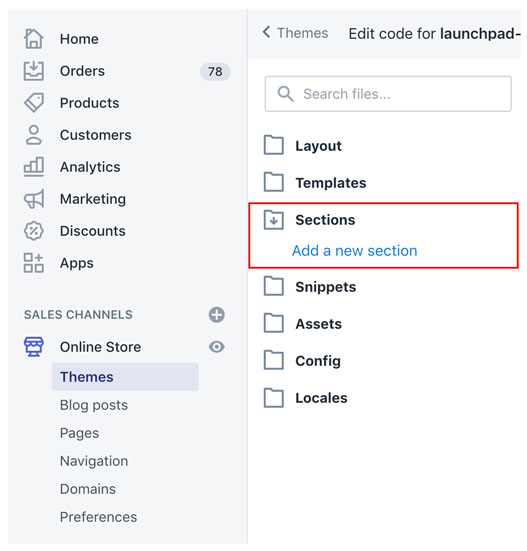
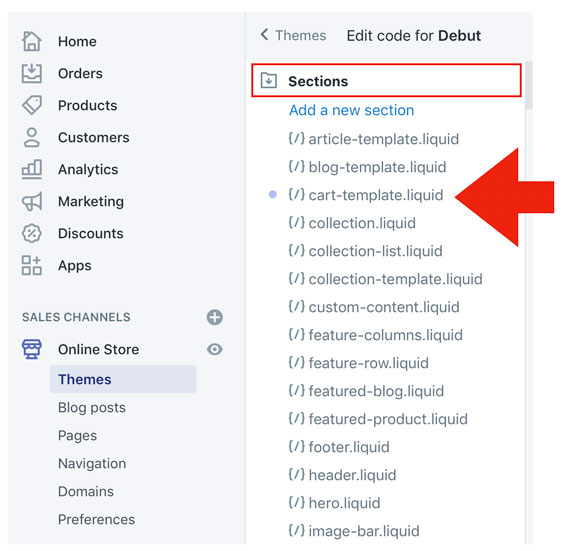
Click on Sections. If you have an entry for {/} cart-template.liquid then continue onto Step 2b: How to modify a Shopify theme with sections. If you don’t, as is the case in the illustration below, jump to Step 2c: How to modify a Shopify theme without sections.
2b. How to modify a Shopify theme with sections. |
Return to top. |
Step 1
Click on the {/} cart-template.liquid entry in Sections.
Step 2
The template code will appear in the right panel. Search for the cart button container. It will appear in the in the file like this:
![]()
You can use the search capability of your browser to locate the container by holding down Command+F if you’re on a Mac, or Control+F if you’re on a PC. If you type “button” into the the search field, you should be delivered to the container.

Step 3
Below the button container you’ll see the cart__submit-controls div:
![]()
Place your cursor at the end of this line and hit the Return or Enter key to create a new line below it.

Step 4
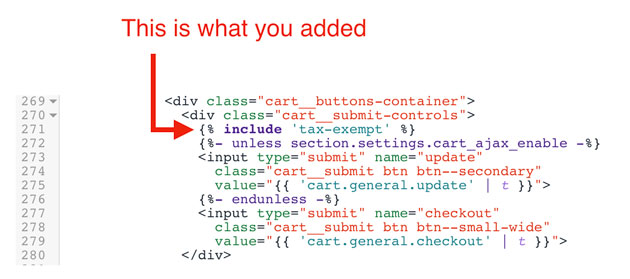
Drag your mouse across the code in the yellow box below. Copy it to your clipboard. (Command+C for Mac; Control+C for PC).
{% include 'tax-exempt' %}
Paste the code (Command+V for Mac; Control+V for PC) into the new line you just created below the cart__submit-controls div.
When you’re done, the cart__submit-controls div should look like this:
Step 5
Click on the Save button located at the top right corner of your screen to save the changes to the template.
Step 6
Skip to Step 3: Choose the app settings.
2c. How to modify a Shopify theme without sections. |
Return to top. |
Step 1
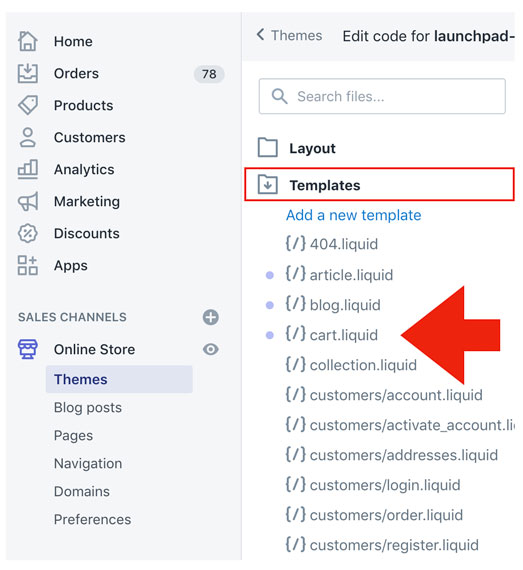
Click on Templates and then {/} cart.liquid.
Step 2
The template code will appear in the right panel. Search for an input HTML element named “update”. It will appear in the in the file like this:
![]()
You can use the search capability of your browser to locate the update input element by holding down Command+F if you’re on a Mac, or Control+F if you’re on a PC. If you type “update-cart” into the the search field, you should be delivered to the element.

Step 3
Place your cursor at the beginning of this line and hit the Return or Enter key to create a new line above it.

Step 4
Drag your mouse across the code in the yellow box below. Copy it to your clipboard. (Command+C for Mac; Control+C for PC).
{% include 'tax-exempt' %}
Paste the code (Command+V for Mac; Control+V for PC) into the new line you just created above the update input element.
When you’re done, the code should look like this:
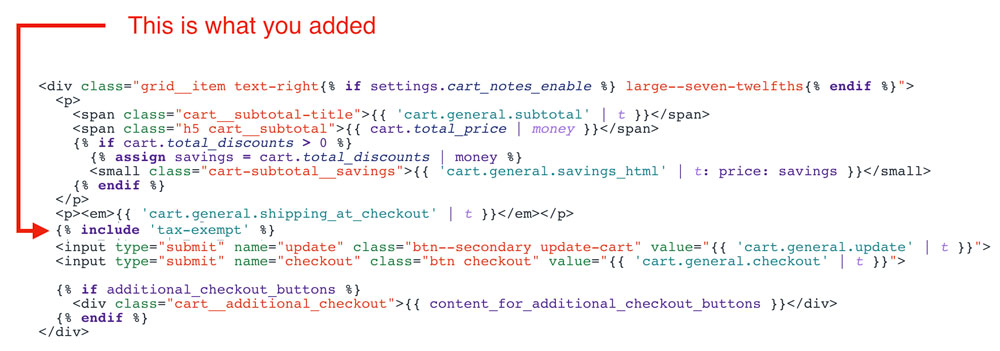
Step 5
Click on the Save button located at the top right corner of your screen to save the changes to the template.
Step 6
Skip to Step 3: Choose the app settings.
3. Choose the app settings |
Return to top. |
Begin by selecting Apps from the Shopify menu. Locate the entry for the Tax Exempt Checkout app and click on the app name to access the app preferences.

You will be delivered to the Settings page. Here you’ll specify the wording and content you’d like presented on the Tax Exempt Status widget that appears on the Cart page.
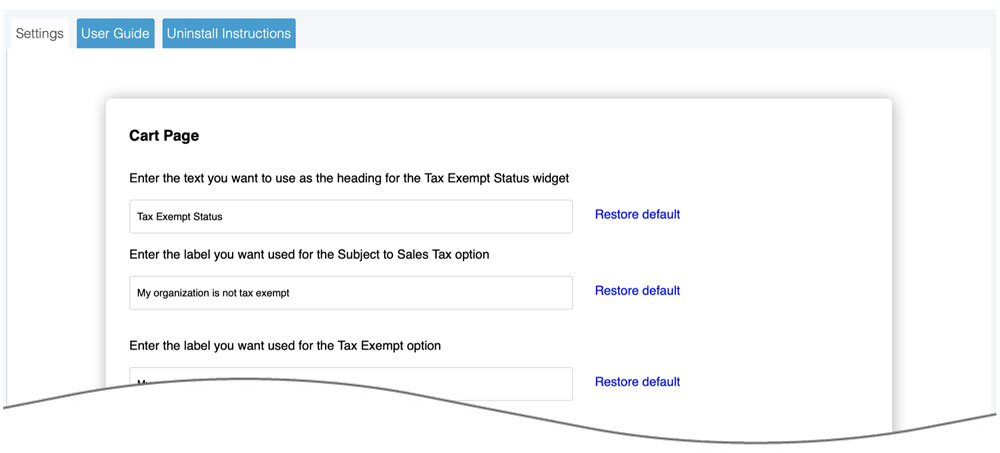
Refer to the image below to understand where each of the settings appears in the Tax Exempt Status widget.
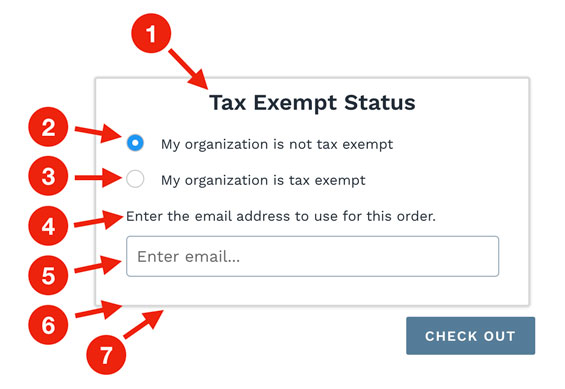
| 1 | Enter the text you want used for the header of the Tax Exampt Status widget. |
| 2 | Enter the label you want used for the Subject to Sales Tax option. The shopper will be charged sales tax if this option is selected and the ship-to address is located in an area for which you collect sales tax. |
| 3 | Enter the label you want used for the Tax Exempt option. The shopper will not be charged sales tax if this option is selected and the ship-to address is located in an area for which you collect sales tax. |
| 4 | Enter the message you want to display above the email address field. You can include HTML tags to format the message or provide a link to a page on your website. If you need to collect information from the individual about their tax exempt status or inform them about your process for confirming new customers that claim to be tax exempt, this is where you should do it. |
| 5 | Enter the text you want to be used as the placeholder in the email address field. |
| 6 | Enter the HEX value for the color you want to use for the border around the Tax Exempt Status widget. You can use the Color Picker on w3schools.com as a resource if you aren’t familiar with HEX values. When you enter the HEX value, don’t enter the leading hashtag (#) |
| 7 | Enter a numeric value for the desired width of the border for the Tax Exampt Status widget. |
| Email settings: Notification options | Use the radio buttons to choose your notification preference. |
| Email settings: Enter the email… | Enter the email addresses that should receive notices of tax exempt declarations. Separate multiple email addresses with a comma. |
What your shopper sees |
Return to top. |
Your shopper will see the Tax Exempt Status widget when arriving on the Cart page. The exact appearance of the widget will depend on your settings.
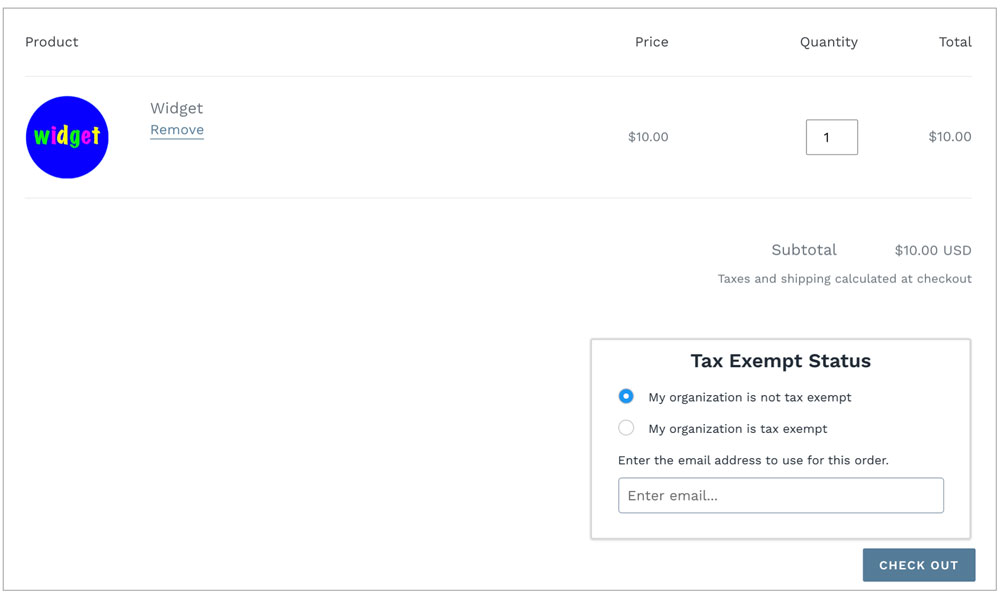
Taxes are applied and visible on the Shipping Methods page, which is the second of three pages in the Shopify checkout process. The images below show the appearance of the page when the address is located in an area for which taxes should be collected.

What you see |
Return to top. |
When a customer declares tax exempt status, you’ll see it reflected in the Customer overview widget when viewing the order.
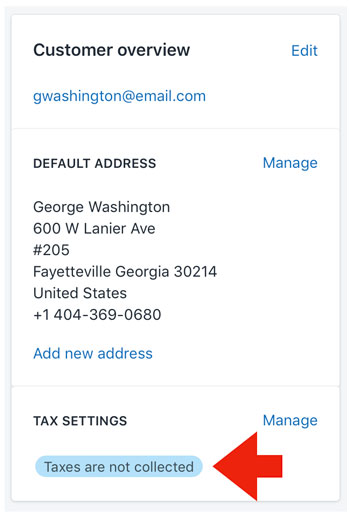
If you have the setting enabled to receive email notifications when a customer declares tax exempt status, you’ll receive an email from info@eniture.com. The email will resemble the following:

How to uninstall the app |
Return to top. |
To uninstall the app, perform the following steps:
Step 1
Login to Shopify with the Store Owner credentials.
Step 2
Click on Apps in the Shopify navigation menu. Locate the app and then click on the app name to access the app settings.

Step 3
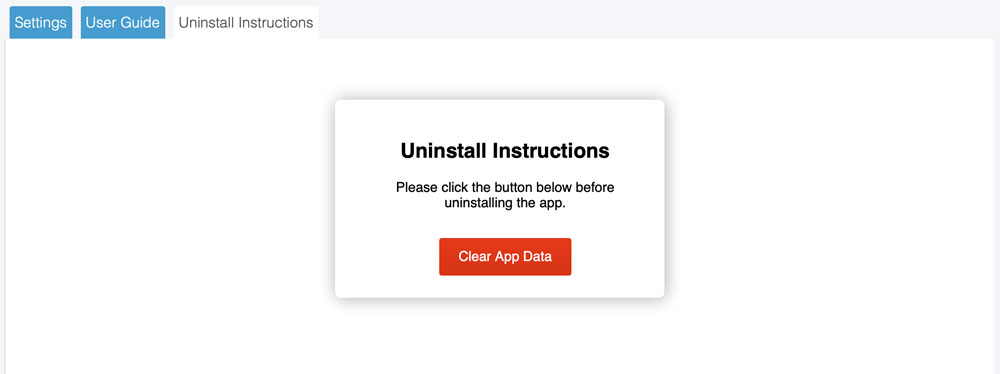
Click on the Uninstall Instructions tab, and then the Clear App Data button.
Step 4
Return to the list of installed apps and click the associated trash can icon.
![]()

