 |
Free Shippingfor WooCommerce |
The Free Shipping plugin uses Shipping Class “Free shipping (ET)” to identify which products will be offered with free shipping. The plugin is compatible with other Eniture Technology shipping quote plugins.
Features
Requires the use of one of Eniture Technology’s Small Package Quotes plugins.
Specify which products qualify for free shipping by setting its Shipping Class.
Paid options for shipping still display when the Cart contains items that don’t receive free shipping.
Current version: 1.0
Requirements
WooCommerce 5.7 or newer.
The installation of at least one of Eniture Technology’s Small Package Quotes plugins.
FAQ’S
What happens if the Cart contains items that aren’t identified for free shipping?
The shipping quotes will be based on the items in the Cart that don’t have their Shipping Class set to Free Shipping (ET).
Installation & User’s Guide
Overview
1. Install the plugin |
Return to top. |
Click on the Download button to download the plugin installation file. Be sure to save it to a familiar location so you can navigate to it during the installation process.
Login to the WordPress dashboard as the website administrator. In the left sidebar, hover your mouse over the Plugins menu to display the sub-menu options. Select Add New from the sub-menu options. The Add Plugins page will load.
At the top of the Add Plugins page, click on the Upload Plugin button.

Controls will appear in the middle of page that will allow you to choose and install the plugin application. Click the Choose File button, navigate to the location where you saved the installation file and select it.

Click the Install Now button.
WordPress will display information about the installation progress at the bottom of the page. The plugin has been installed once the message Plugin installed successfully is displayed.
2. Activate the Plugin |
Return to top. |
Once the plugin has been installed, it must be activated. If you are still on the same page that you were on at the end of Step 2, you can click the Activate Plugin button.

If you’ve already navigated away from that page, select Installed Plugins from the Plugins menu.

Locate the Standard Box Sizes plugin on the list and click the Activate link.

3. Configure the products that get free shipping |
Return to top. |
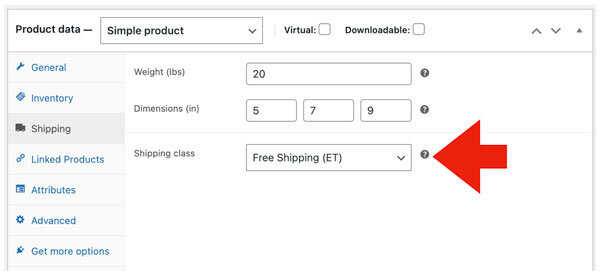
When the plugin is activated, a new Shipping Class named Free Shipping (ET) will be added to your list of Shipping Classes. Assign the Shipping Class to a product to indicate that it shouldn’t be charged for shipping by performing the following steps:
Navigate to Products > All Products
Search for the product of interest, hover over its name in the search results and then click the Edit link.
Scroll down to the Product data section and click on the option for Shipping.
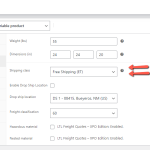
Locate the Shipping class field and choose Free Shipping (ET) from the dropdown list.
Locate and click on the Update button which will normally be located at the top right corner of the page.
Repeat these steps for each product for which you want to offer free shipping. If the product is a Variable product, refer to the Woocommerce documentation for instructions on how to set the Shipping Class for it variations.

4. How it works |
Return to top. |


